October 10, 2026
What a Radon Vent Pipe Does and Why It Matters for Your Home
By @getradonventpipenews
The Radon Vent Pipe: A Core Component of Mitigation
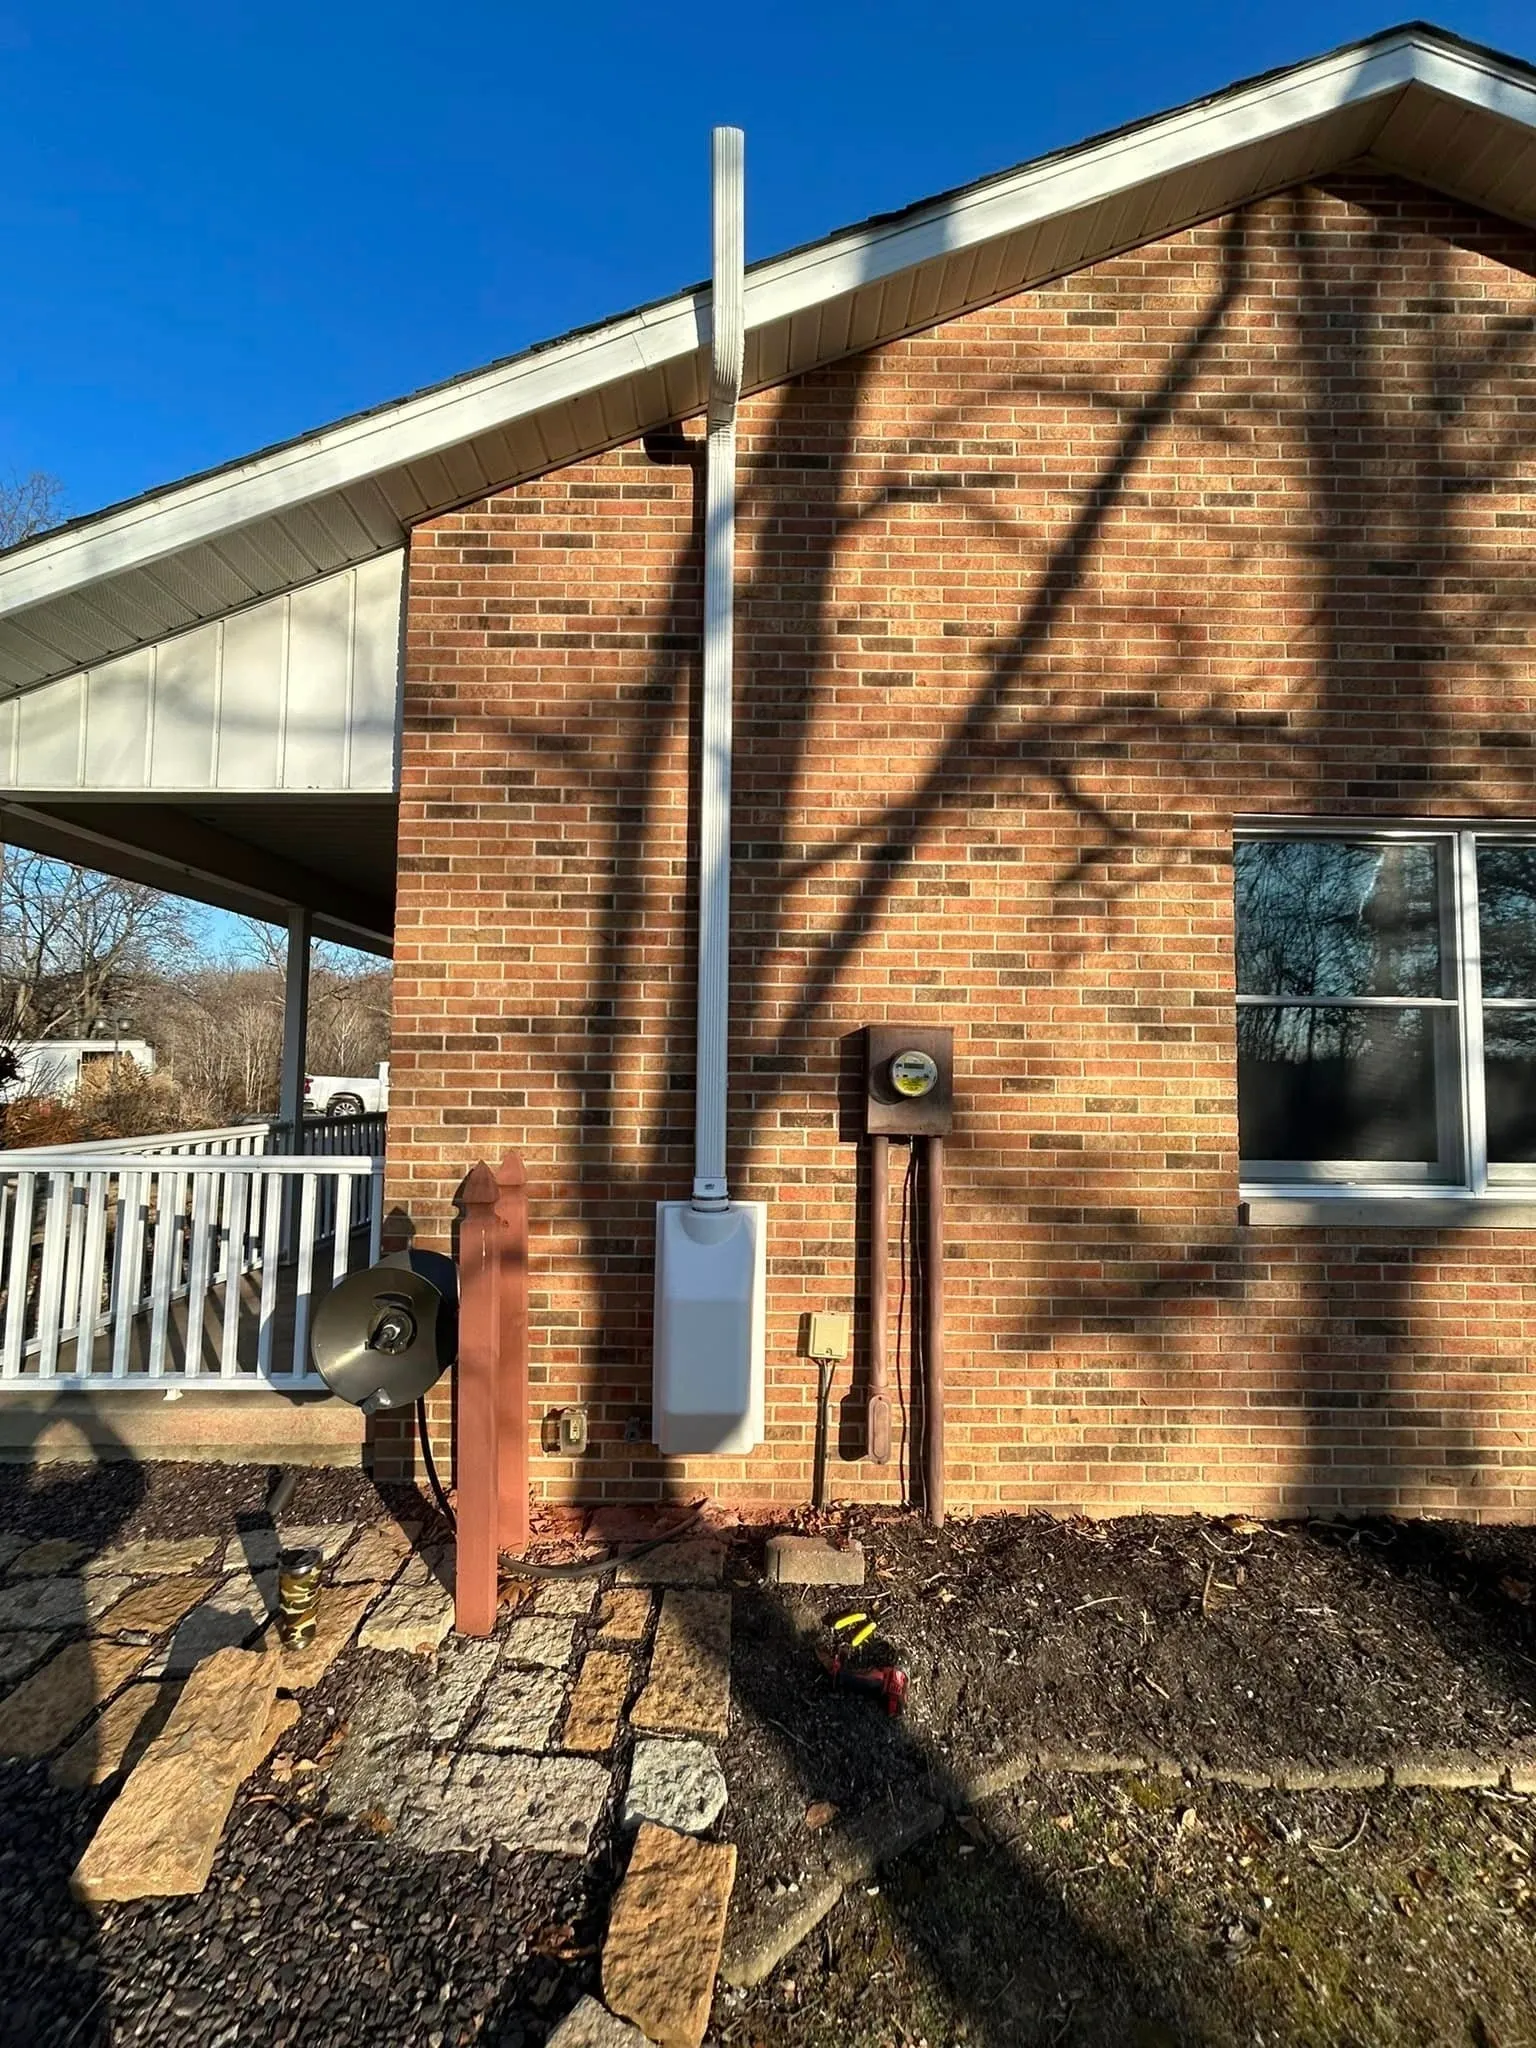
When I first started working in radon mitigation over a decade ago, I remember a homeowner in St. Louis asking me, "Is that white pipe on the side of my neighbor's house just for show?" It's a fair question. A radon vent pipe looks simple, but it does critical work. It is the main channel that carries soil gas from beneath your foundation up to the roof, where it safely disperses into the outdoor air. Without it, a radon mitigation system cannot function.
Radon itself is a radioactive gas that comes from the natural decay of uranium in soil. It moves through the ground and enters homes through cracks in the basement slab, gaps around pipes, or openings in a crawl space. The only reliable way to keep it out is to reverse that pressure difference. That is where sub-slab depressurization comes in. A fan assembly creates a vacuum beneath your basement slab or under the crawl space, and that vacuum pulls the soil gas toward a suction pit or sump. From there, the gas travels up the radon vent pipe and exits above the roofline.
I have seen many systems over the years, and the best ones share a few common traits. The pipe itself is usually 3-inch or 4-inch PVC pipe, because that diameter handles the airflow without creating too much back pressure. It needs to be continuous and airtight from the suction pit all the way to the termination point. Any leak in the pipe or at a joint can reduce the vacuum and let radon back into the living space. That is why a proper install includes careful sealing at every connection.
Where the Radon Vent Pipe Runs
The path of the vent pipe depends on your home's layout. In a house with a basement slab, the pipe often goes straight up through the floor and out through the rim joist or a sidewall. In a house with a crawl space, the pipe may run horizontally under the floor for a short distance before turning upward. Either way, the goal is the same: get the gas up and out. The pipe flashing is the piece that seals the pipe where it passes through the roof or wall. If that flashing is not done well, you can get water leaks or air leaks that hurt performance.
One detail that many homeowners miss is the vacuum gauge, often called a manometer. This small device, mounted on the pipe or near the fan assembly, shows whether the system is maintaining negative pressure under the slab. I always tell my clients to glance at it once a month. A reading that stays steady means the system is working. A sudden drop could mean a pipe got knocked loose or the fan assembly failed. The manometer is your system's heartbeat monitor.
Another important piece is the damper. Not every system needs one, but on a long run of pipe, a damper lets you fine-tune the airflow. It can reduce the amount of air being pulled from the soil, which might be necessary if the fan is oversized or if the soil is very permeable. Adjusting a damper is a job for a professional, because you want to keep the vacuum high enough to capture radon but not pull so much conditioned air out of the house that you waste energy.
Testing and Verification
After a radon mitigation system is installed, the next step is post-mitigation verification. This usually involves a radon test that runs for at least 48 hours, sometimes longer. The EPA recommends that the test be conducted by a qualified professional using a continuous radon detector or a charcoal canister. The goal is to confirm that the radon level in the home is below 4 picocuries per liter, which is the EPA's action level. I have seen systems that brought levels from over 20 pCi/L down to below 1 pCi/L. That is a dramatic reduction, and it all depends on the vent pipe staying clear and the fan running properly.
Air Sense Environmental, a company I have worked with on several projects in St. Louis, follows that same thorough approach. They test before any work begins to get a baseline, then design the system around the home's specific foundation type and soil conditions. After installation, they do a follow-up radon test to make sure the numbers are good. It is a simple process, but it works.
One thing I have learned is that not every home needs the same type of suction point. For a basement slab, a single suction pit or sump is usually enough. For a crawl space, you might need multiple suction points or a wider trench. The size and number of suction pits affect how the radon vent pipe connects and how the vacuum is distributed. A good installer will do a smoke test or a pressure test to check that the vacuum is reaching all parts of the foundation.
Common Mistakes and How to Avoid Them
I have seen a few common mistakes over the years. The first is undersizing the pipe. A 2-inch PVC might work for a very small system, but it creates too much friction for most homes. The fan has to work harder, and the vacuum at the suction pit may be too weak. Stick with 3-inch or 4-inch PVC pipe for the main run. The second mistake is poor pipe flashing. If the flashing is not sealed to the roof or wall, you can get water intrusion that damages the fan or the pipe itself. The third mistake is placing the termination too low. The end of the radon vent pipe must be above the roofline, at least 10 feet from any window or door, and away from air intakes. If the gas exits too close to an open window, it can be pulled right back inside.
Another issue is the fan assembly location. Some installers put the fan in the attic or outside the house. That is fine as long as it is rated for outdoor use and protected from weather. But I have seen fans installed inside a crawl space where they are hard to service. The fan has a limited life, usually 5 to 10 years, and it needs to be accessible for replacement. Keep that in mind when you choose an installer.
Finally, do not ignore the manometer. If the system has a vacuum gauge and you never check it, you might miss a failure until your next radon test. A simple glance once a month can save you from living with elevated radon for months. I recommend putting a note on your calendar or near the gauge as a reminder.
Why Professional Installation Matters
Radon mitigation is not a DIY project for most homeowners. It involves drilling through the basement slab, running pipe through walls or floors, and sealing everything to code. A mistake in the installation can leave you with a system that does not work, or worse, one that creates a new pathway for radon to enter. A professional like Air Sense Environmental has the tools and experience to do it right. They also handle the radon test and the post-mitigation verification, which means you get a documented result that satisfies most real estate transactions.
That said, there are ways to be an informed homeowner. Learn where your radon vent pipe runs. Know where the manometer is. Ask your installer about the expected vacuum reading. If the number changes later, you can call for a checkup before the problem gets worse. A little awareness goes a long way.
In St. Louis, radon levels vary by neighborhood. Some areas have higher soil radon potential than others. A radon test is the only way to know your actual level. If it comes back high, do not panic. A properly designed radon mitigation system with a solid radon vent pipe, a good fan, and a tight seal will bring those numbers down. It is a proven solution that has been used for decades.
❧